The Eloquence Plug-in
Eloquence is a plug-in for the Eclipse IDE to allow seamless and automated integration of aspect-oriented design pattern implementations with Java/AspectJ projects.
Using the design pattern plug-in
With the design pattern plug-in properly set up, and the two views for the design pattern catalog and the design pattern information added to your favourite perspective, the workspace may look as the following screenshot:

The design pattern catalog shows the design patterns which are known to Eloquence; as mentioned, these are, at the moment, the 23 object-oriented design patterns identified by (Gamma et Al., 1995), known as the 'Gang-of-Four Design Patterns', as well as the 4 aspect-oriented design patterns identified by (Miles, 2004), known as the 'AspectJ Cookbook Design Patterns'. The design patterns are grouped, to the extent relevant, into categories, such as of creational, structural, and behavioural design patterns.
The following illustrations will use the 'Sample' design pattern, which is a hypothetical design pattern only used to show the use and extensibility of the design pattern plug-in. This design pattern has no (at least no useful) significance -- its only purpose is illustration; because of that, it is obviously not included with the design pattern plug-in available on the Eloquence website on the Internet.
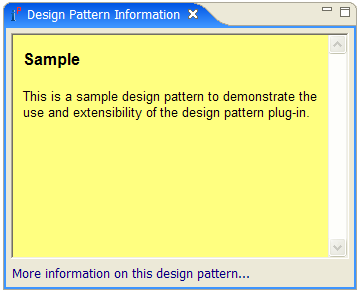
Left-clicking on a design pattern or category in the design pattern catalog view updates the design pattern information -- it always reflects the currently selected design pattern. The design pattern information view shows the name and the intent of the design pattern and provides an additional hyper-link More information on this pattern... that displays further information on the currently selected design pattern in the help system. The information follows the usual notation, listing -- to the extent possible -- the name and classification, the intent, the also-known-as, the motivation, the applicability, the structure, the participants, the collaborations, the consequences, the implementation, the sample code, the known uses, and the related patterns of a design pattern; there is one additional property, special remarks, which contains special remarks on the integration of the particular design pattern using the design pattern plug-in. The hyper-link may be greyed out; this is the case if there is no further information available:
Right-clicking on a design pattern or category in the design pattern catalog view opens the following context menu:

Both the Introduce... and the Impose... actions on a particular design pattern will launch the integration wizard for the respective design pattern. The difference between introducing and imposing is that introducing generates skeleton classes for the roles participating in the design pattern whereas imposing does not. In effect, the difference is only that the check-box controlling this behaviour in the integration wizard is ticked in the one case, and un-ticked in the other case. We will discuss the integration wizard itself in much more detail further on in the next section.
The effect of the More information... action is identical to activating the hyper-link already discussed. The following is a screenshot of the help system as it could possibly look for the 'Sample' design pattern:
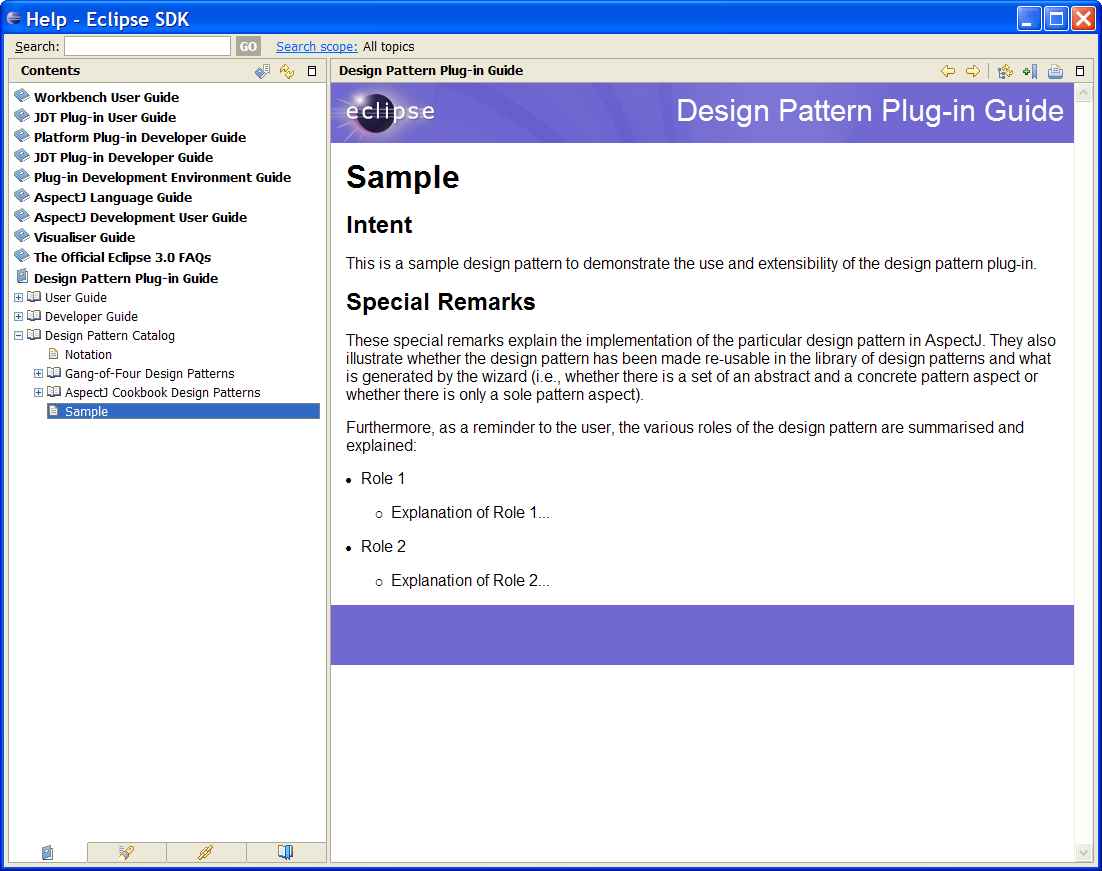
In this case, only the name, intent and special remarks of the design pattern are given-- the other attributes are simply not defined for 'Sample'. If the information on a particular design pattern has been taken from (Gamma et Al., 1995) or (Miles, 2004) (which is, for example, the case for the intent statements), the information is properly quoted and the references are mentioned.
Furthermore, as you can see from the navigation panel in the screenshot, there is more to the help than just the information on each of the design patterns in the catalog. Most of the contents of this section are available as well, split into a user guide and a developer guide.
Double-clicking on a design pattern in the design pattern catalog view launches the integration wizard for the respective design pattern. As discussed already, the integration wizard has three steps: the overview page, the project and folder selection page, and the code mapping page. The following are screenshots of these pages:
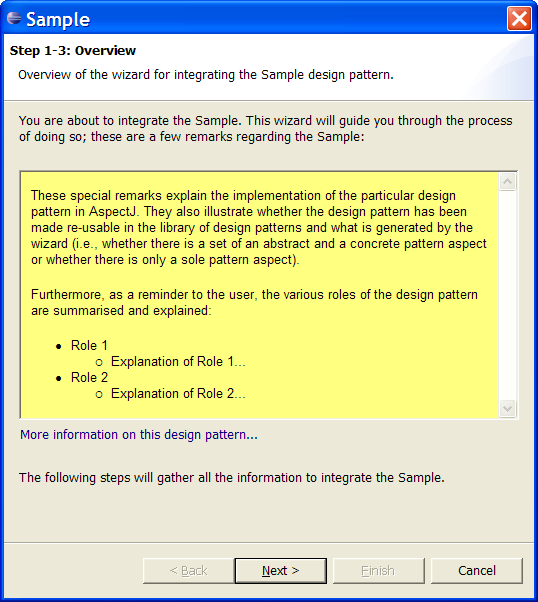
The first step, the overview page, displays the special remarks of the particular design pattern. These special remarks explain the implementation of the particular design pattern in AspectJ. They also illustrate whether the design pattern has been made re-usable in the library of design patterns and what is generated by the wizard (i.e., whether there is a set of an abstract and a concrete pattern aspect or whether there is only a sole pattern aspect). Furthermore, as a reminder to the user, the various roles of the design pattern are summarised and explained. If the special remarks are not enough and the user requires further information, the hyper-link to More information on this pattern... will again display the corresponding design pattern in the help system.
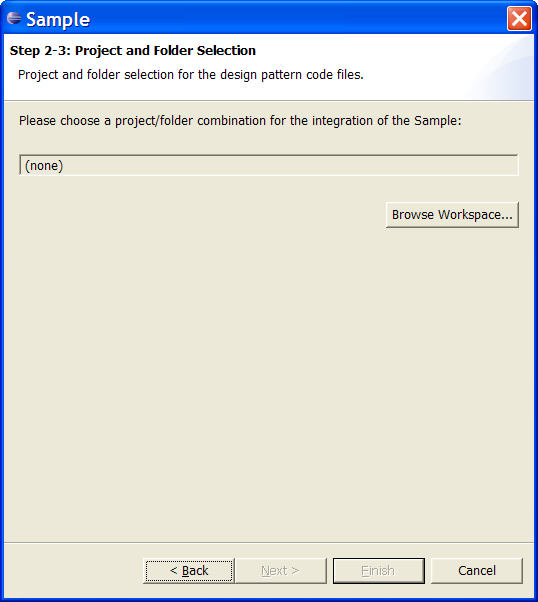
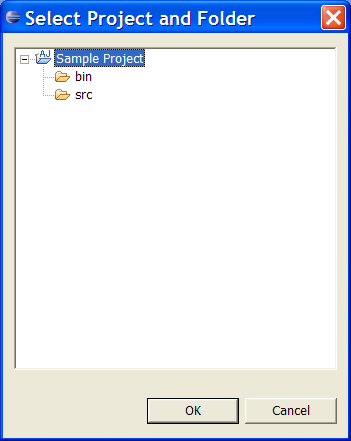
The second step, the project and folder selection page, lets the user choose a project and a folder into which the design pattern code is generated. Clicking Browse Workspace... launches an appropriate dialog; besides being convenient for the user, this dialog also ensures that the project and folder selection is valid, i.e. that both exist within the workspace:
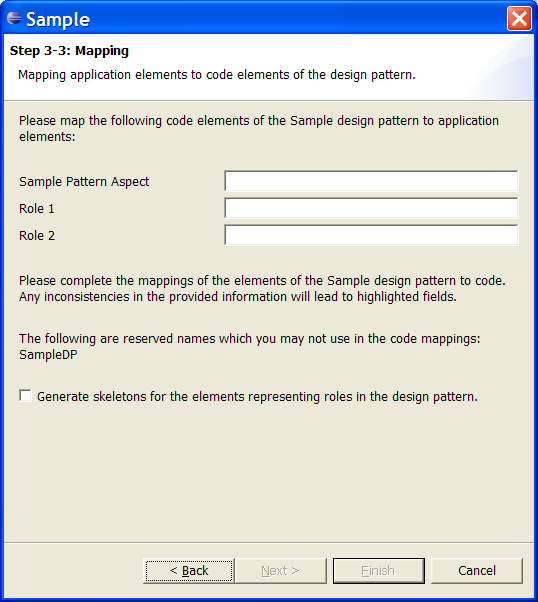
The third step, the code mapping page, is used to map the code elements of a particular design pattern to application elements. For each of the roles in the design pattern, enter a class which is supposed to represent that role. Hovering over the various fields gives a succinct description of the respective role. Tick Generate Skeletons... if you would like to generate skeletons for the classes, aspects, and interfaces representing roles in the design pattern. It should be noted that the wizard validates that the information provided by the user consists of valid Java/AspectJ type names; furthermore, there may be a set of reserved type names for a particular design patterns which are not allowed to be used. If any of these constraints is violated, the corresponding field is highlighted to alert the user that there is a field requiring their attention.
If the particular design pattern being added makes use of a library of re-usable design pattern implementations, you need to ensure that this library is available on the classpath. Remember this advice if you encounter any compiler warnings or errors after having instantiated a design pattern. The Eloquence design pattern library comes with the design pattern plug-in, but is also available at http://eloquence.sourceforge.net.
Finally, clicking Finish on the wizard generates all the code required for the particular design pattern instance and displays the generated files in the workspace:
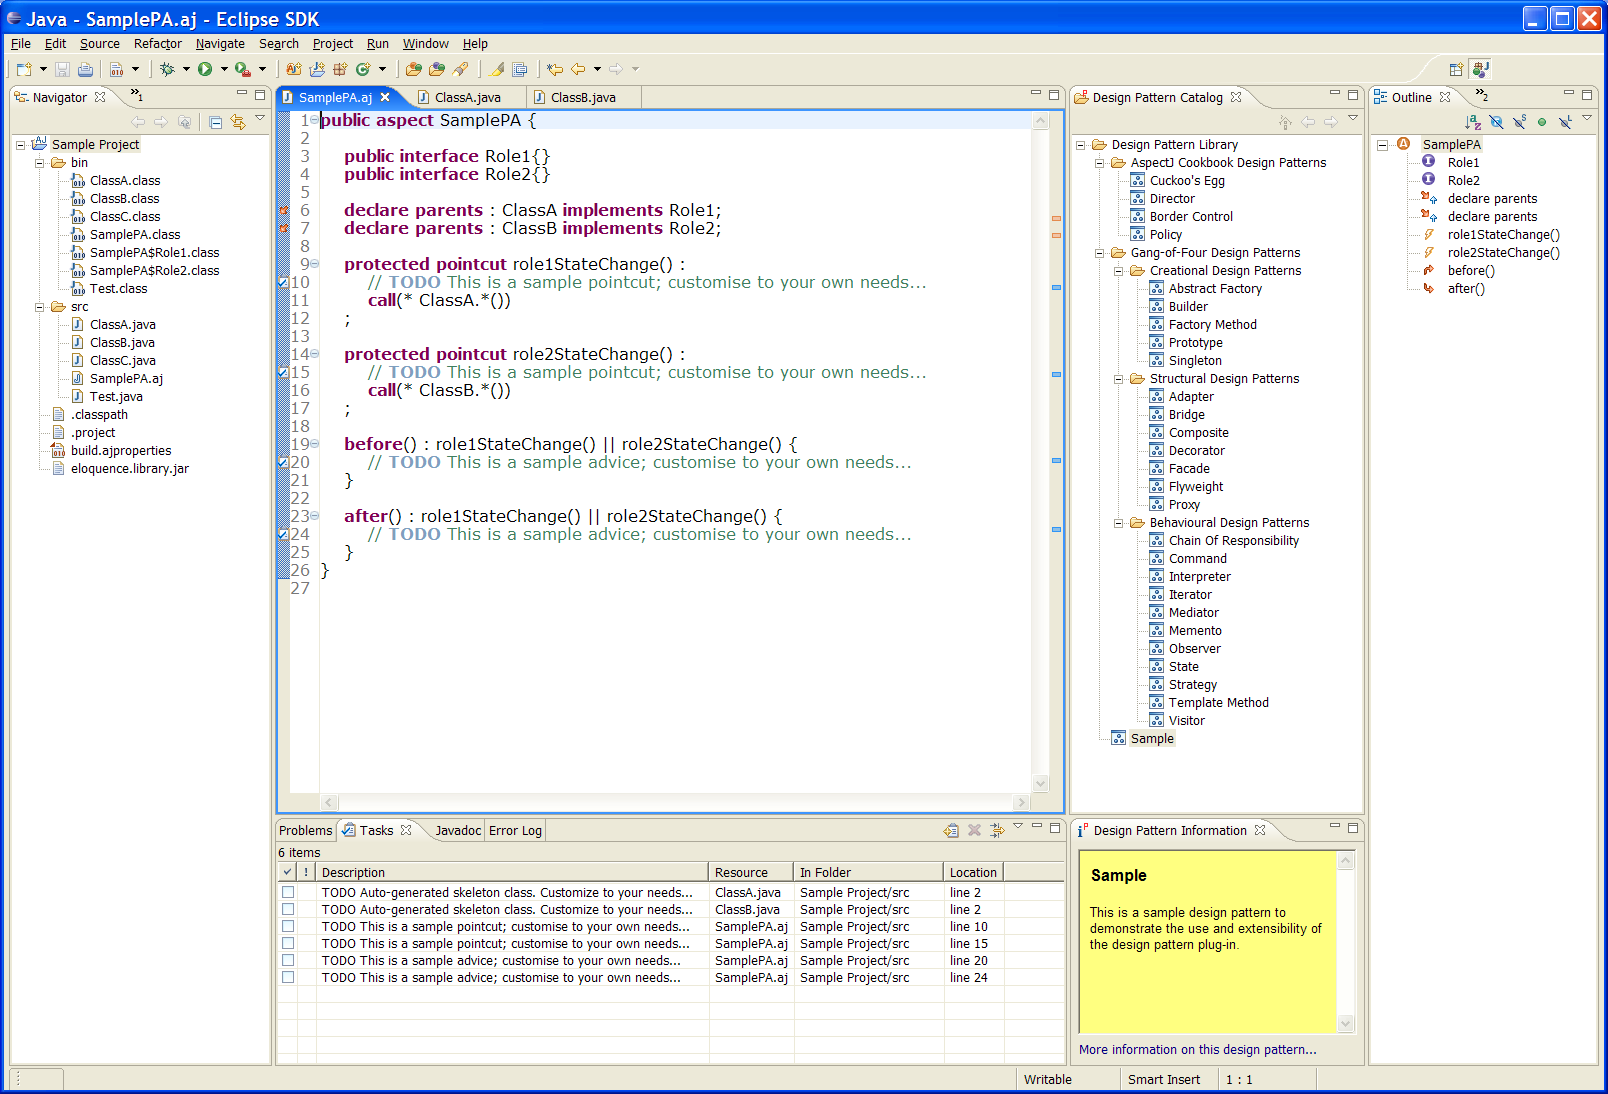
If there is some customisation required on behalf of the user, the design pattern plug-in adds 'todo'-items to the task list in the Eclipse workbench:

The 'Sample' design pattern adds six such 'todo'-items. This is just for illustration, usually there will not be as many. The action of double-clicking on any of them jumps to the corresponding line in the code.